
October 26, 2026
Skills Insert 1: The Fit vs. Mobility Conundrum
The fitted sleeve block we drafted as part of the basic pattern block is a nice starting point for learning how the armscye and sleeve cap fit together as a unit, but it’s not the most reasonable block to use for everyday pattern drafting exercises. For one, most garments don’t have an elbow dart in them (you might find one in some of your formalwear or workwear garments, if you have them). The fitted basic pattern block also doesn’t allow for a reasonable amount of movement. We’re trying to draft clothes we actually want to wear on a day-to-day basis, right?!
This is where the straight sleeve and short sleeve (or cap sleeve) come into play. The straight sleeve adds more ease in the elbow and wrist, and makes for a great starting point for more voluminous styles or easy fitting shirts. You can shorten a straight sleeve as much or little as you’d like to meet your needs. The cap sleeve is subtly shaped and is great for cute shirts and dresses. From here out, most of my working drafts will probably be derived from my straight sleeve block (sorry fitted sleeve, you’re going to the bottom of the pile).
This is why it was so important for me to get the ease right on this version, which meant I had to re-draft my bodice block as well.
I started by drafting the straight sleeve and cap sleeves without changing the geometry of the sleeve cap. In my first muslin, I could tell that—even with the shorter length of the cap sleeve—my movement was still limited. You can see in the photo that there’s an immense amount of stress radiating from my upper back and armpits. This simply isn’t acceptable for someone who works in an office and teaches on the regular.
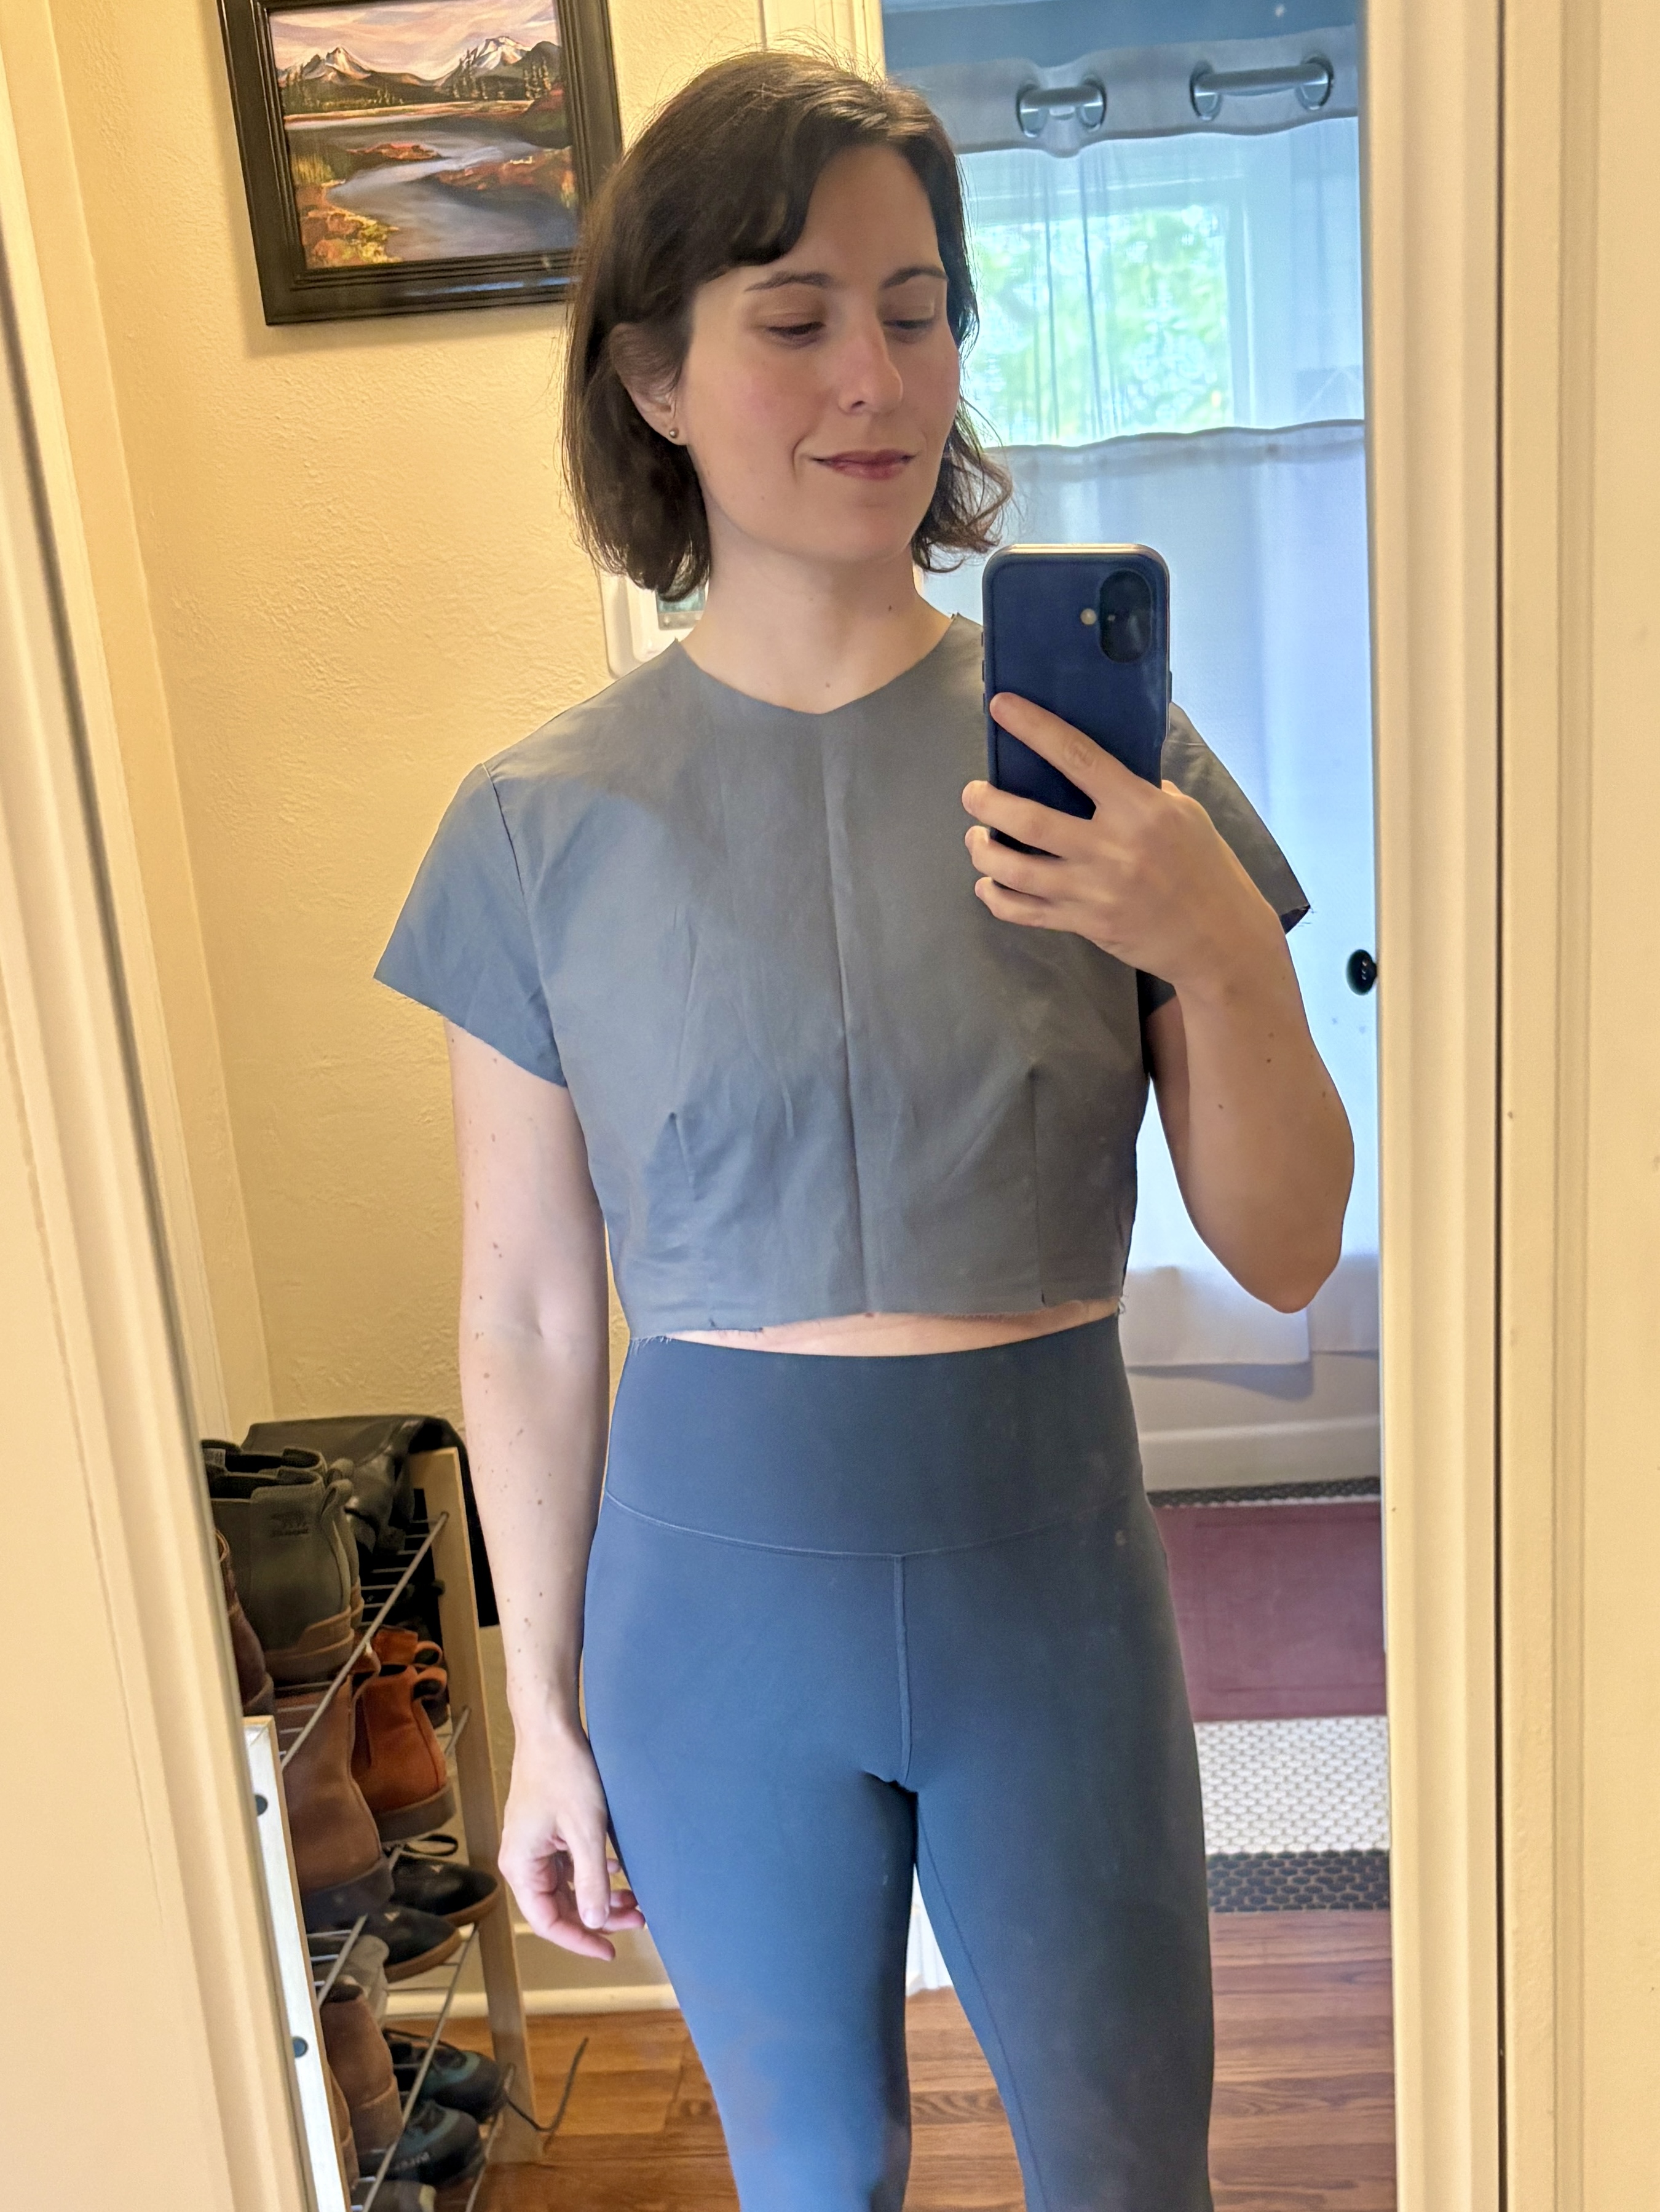
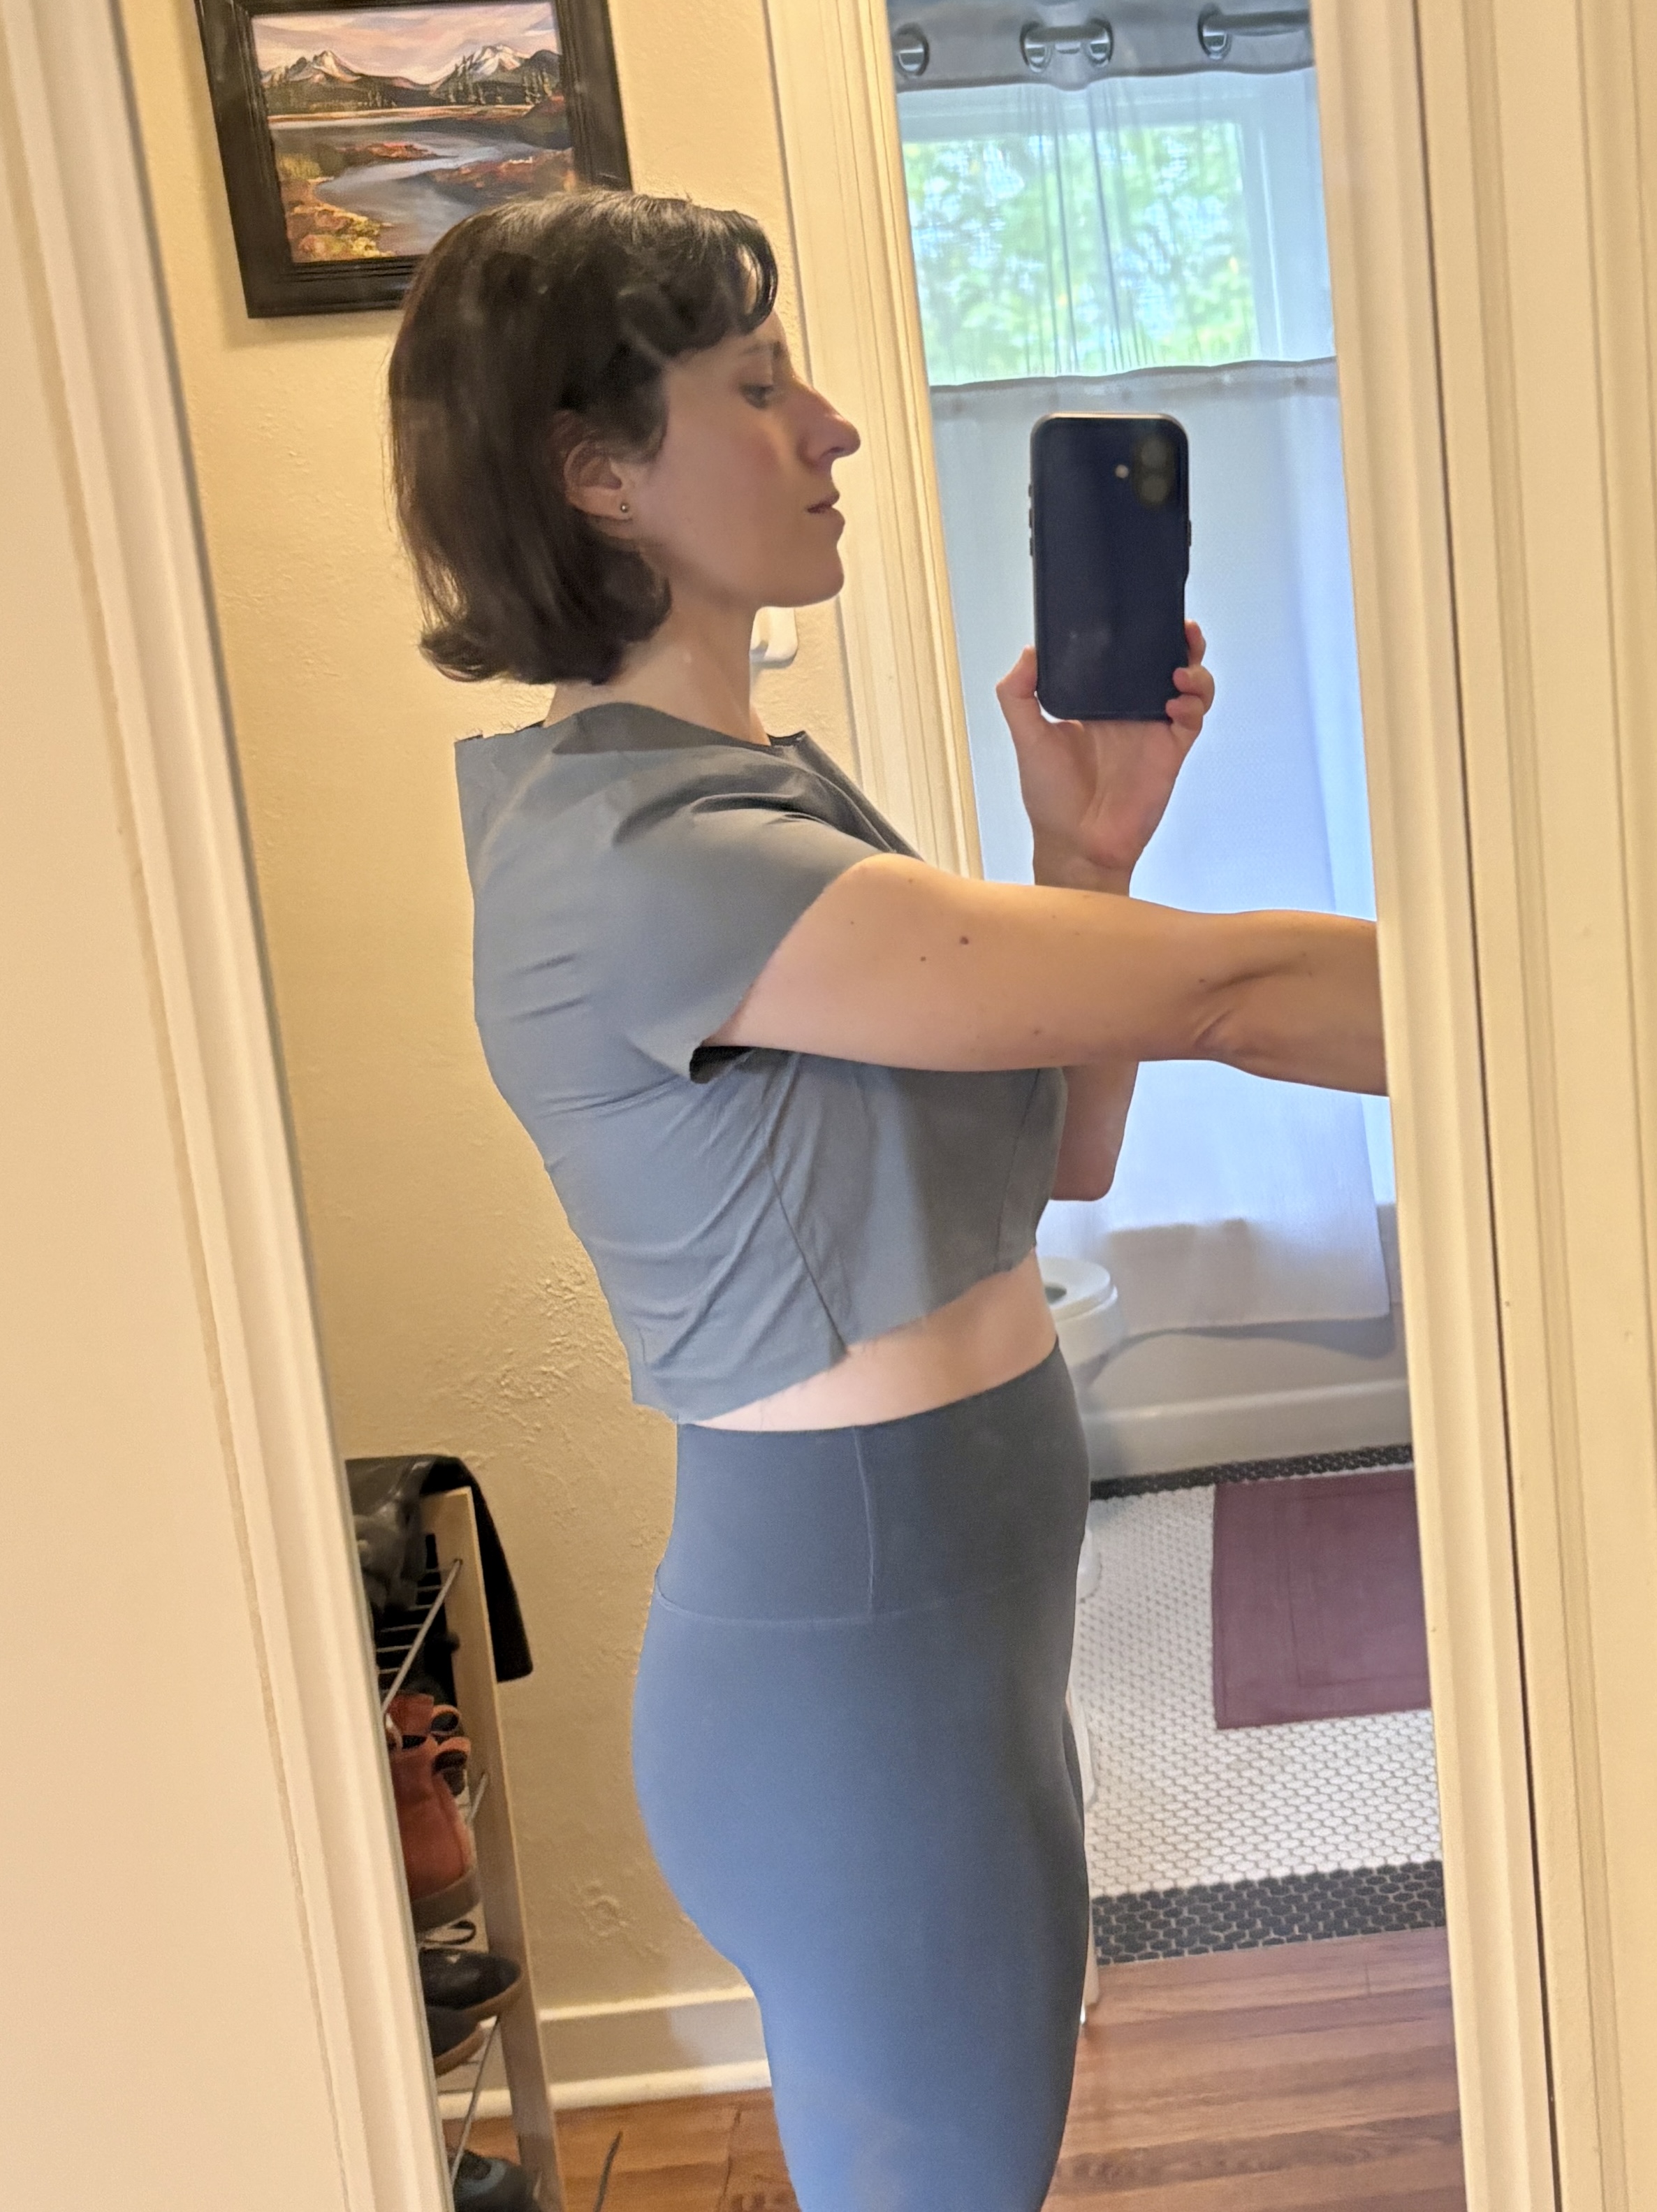
So, my next step was to widen the bicep to 14” and increase the overall cap ease by an inch or two. I compared my first muslin to one of my favorite RTW dresses to determine that most of the ease needed to be added at the shoulder seam on the bodice armscye, and that the width of my cap needed to be about 10” at the mid-way point. My next muslin was much better, but you can see that there’s still some pulling at the back and armpits. I knew I could improve it even more.
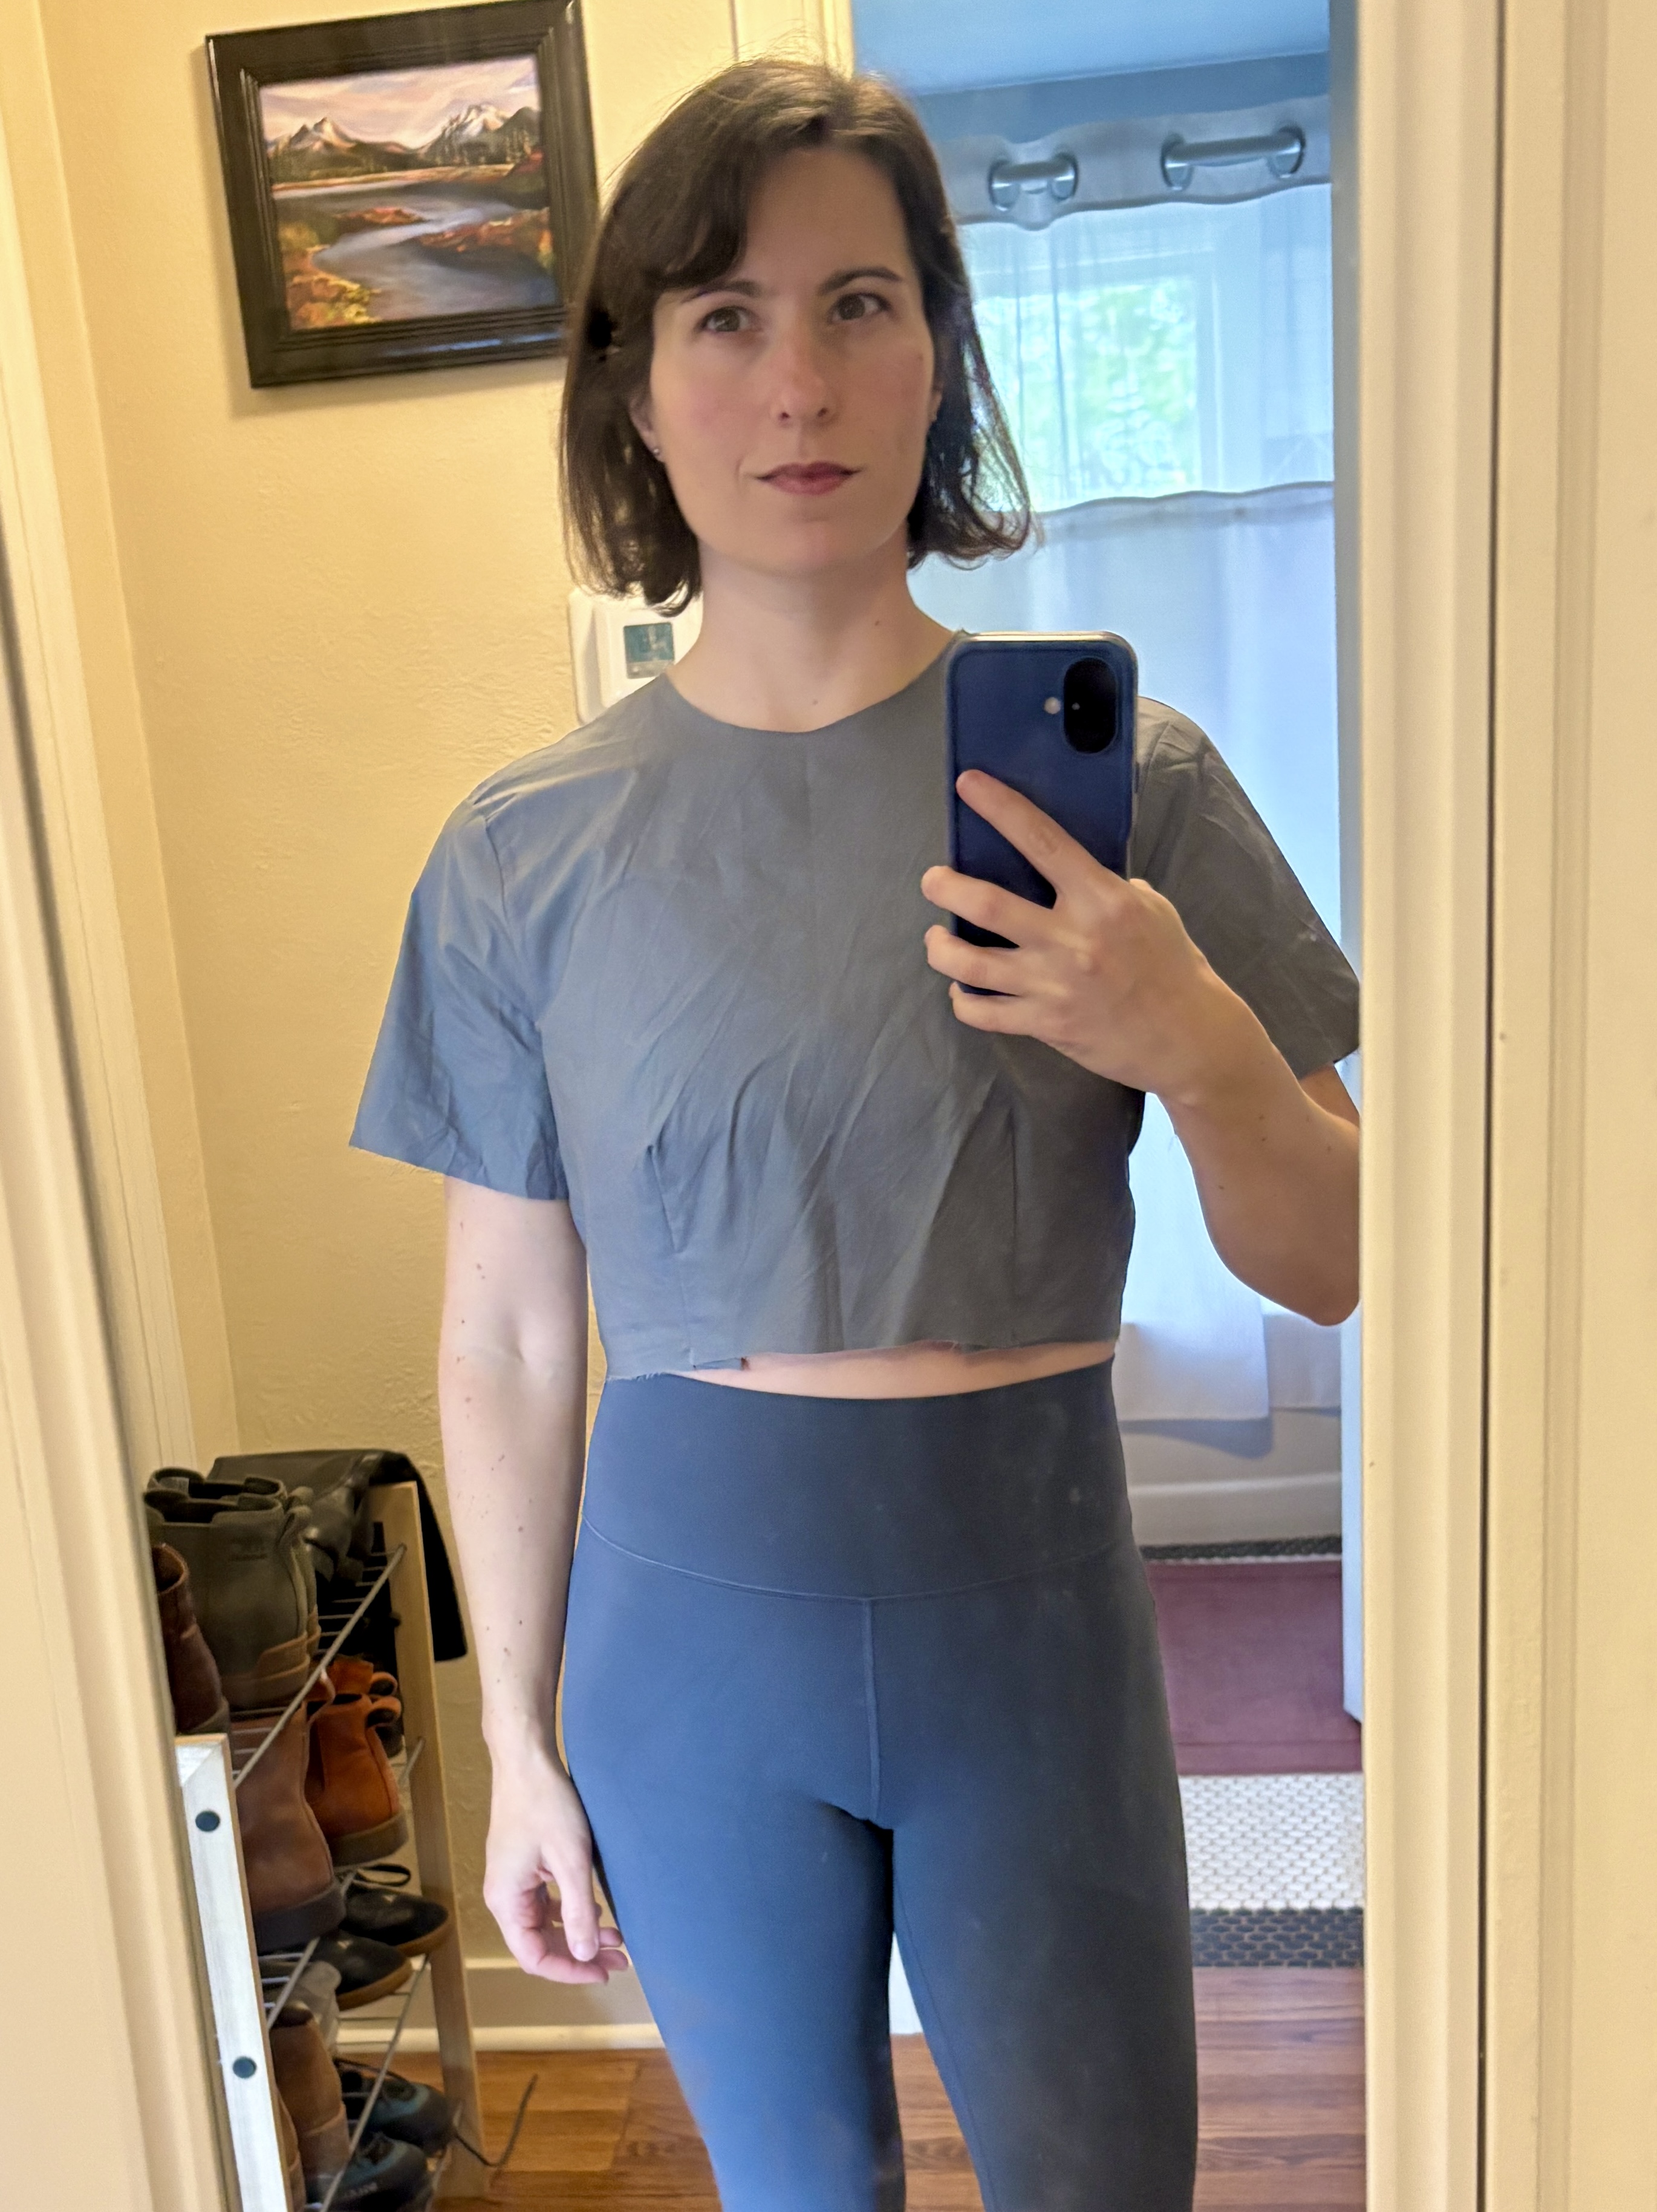
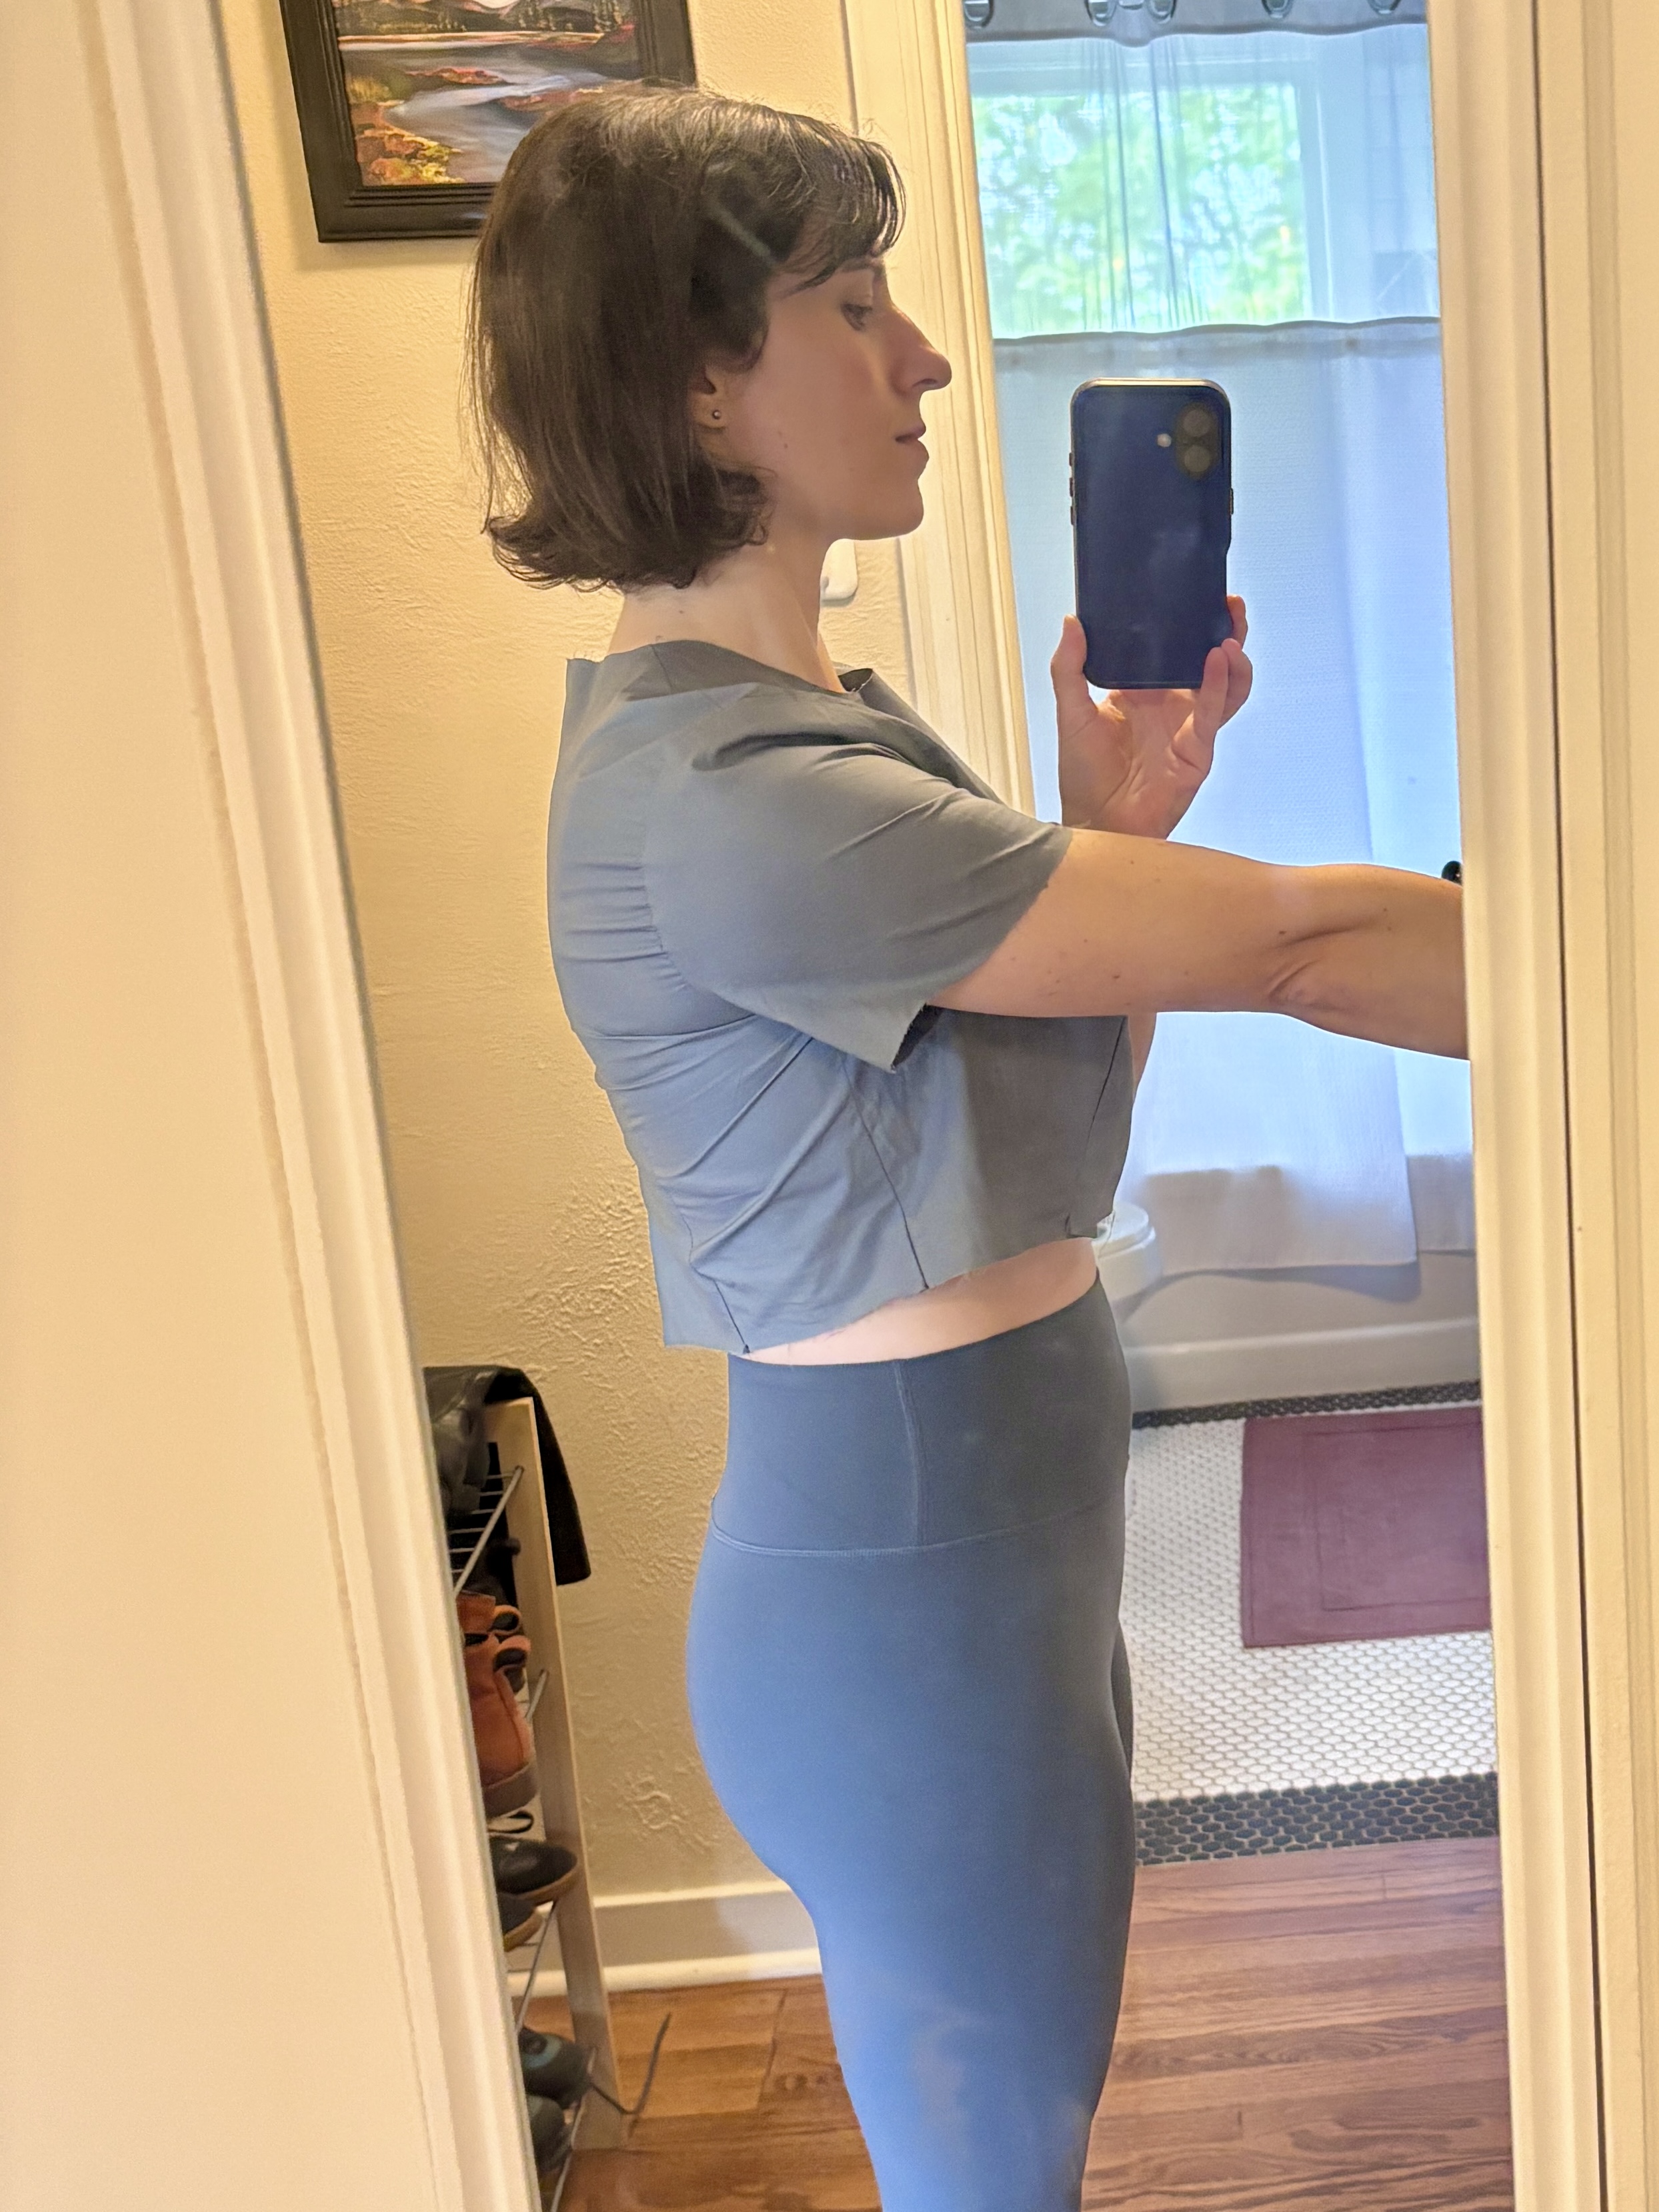
For my third try, I made minor adjustments, moving the entire armhole forward by about a quarter inch, shortening the shoulder length, and adding a tiny bit of width to the sleeve cap. This adjustment—even though it was relatively small—made all the difference. My mobility was much improved, although there is still a tiny bit of pulling in the back. Nevertheless, I’m happier with this as a starting point for all my dresses and shirts, and there’s plenty of room to add more ease as needed in my designs (most of my RTW cap sleeve dresses have a bicep width of 15”).
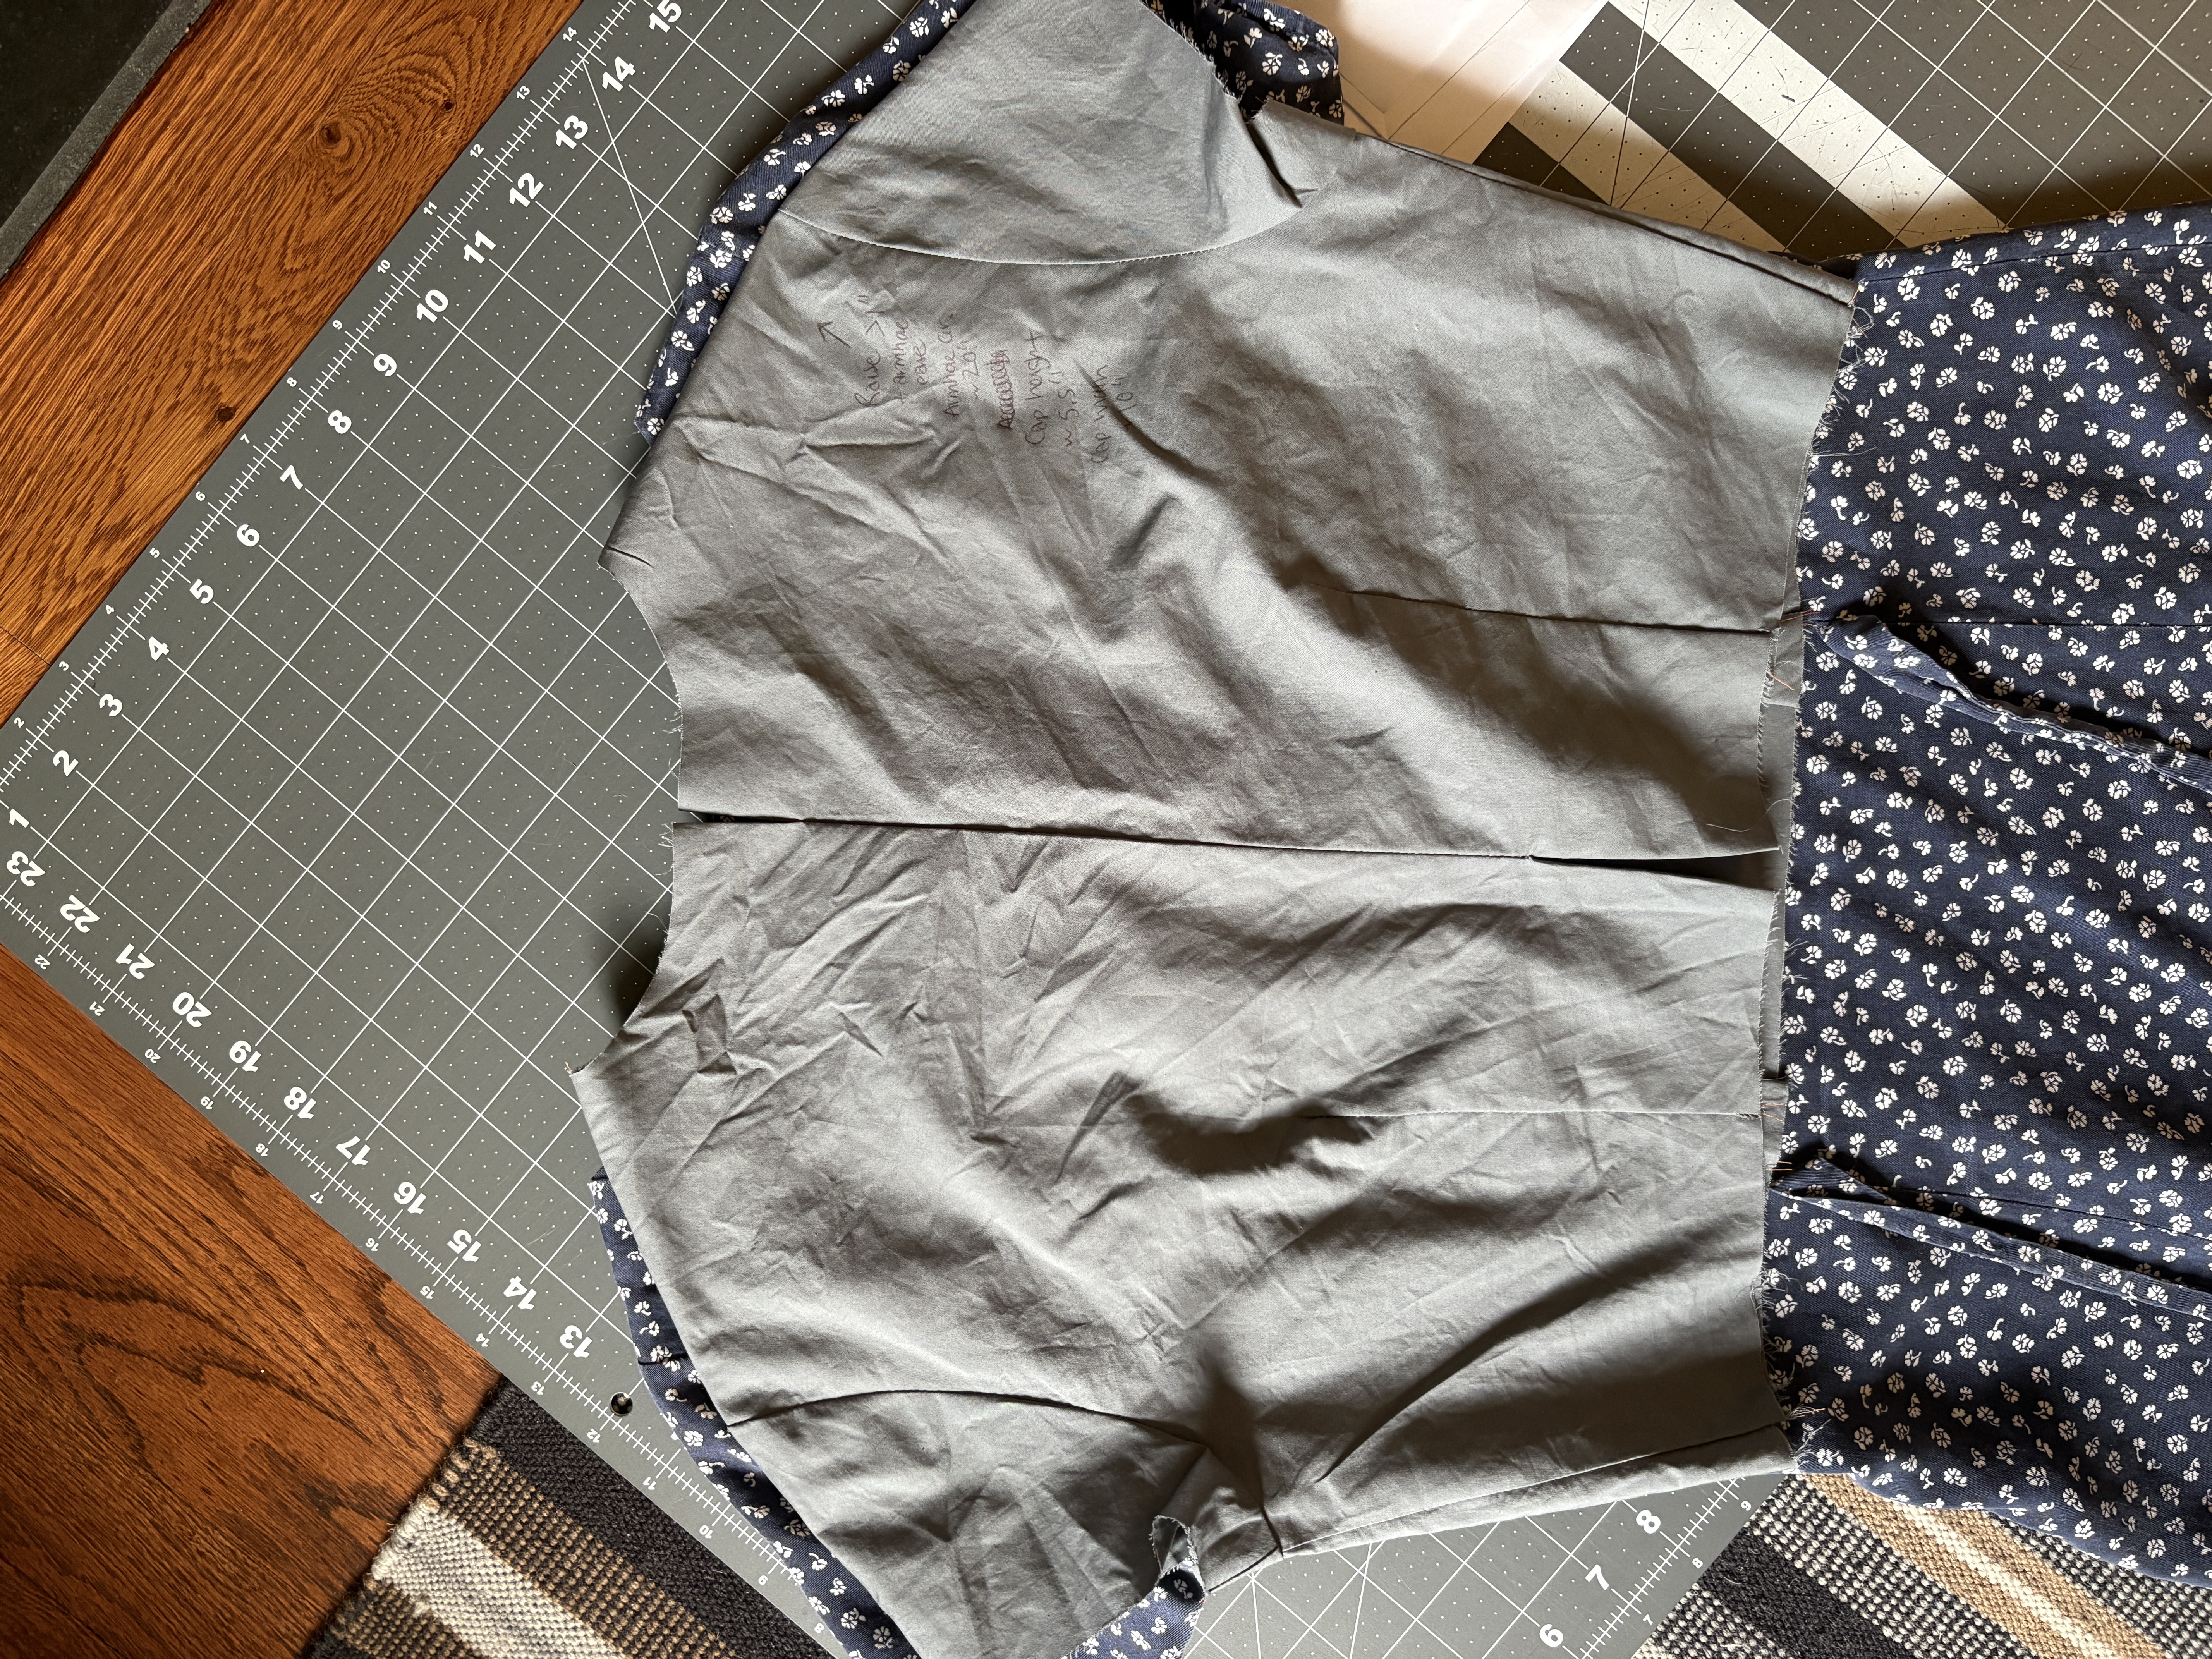
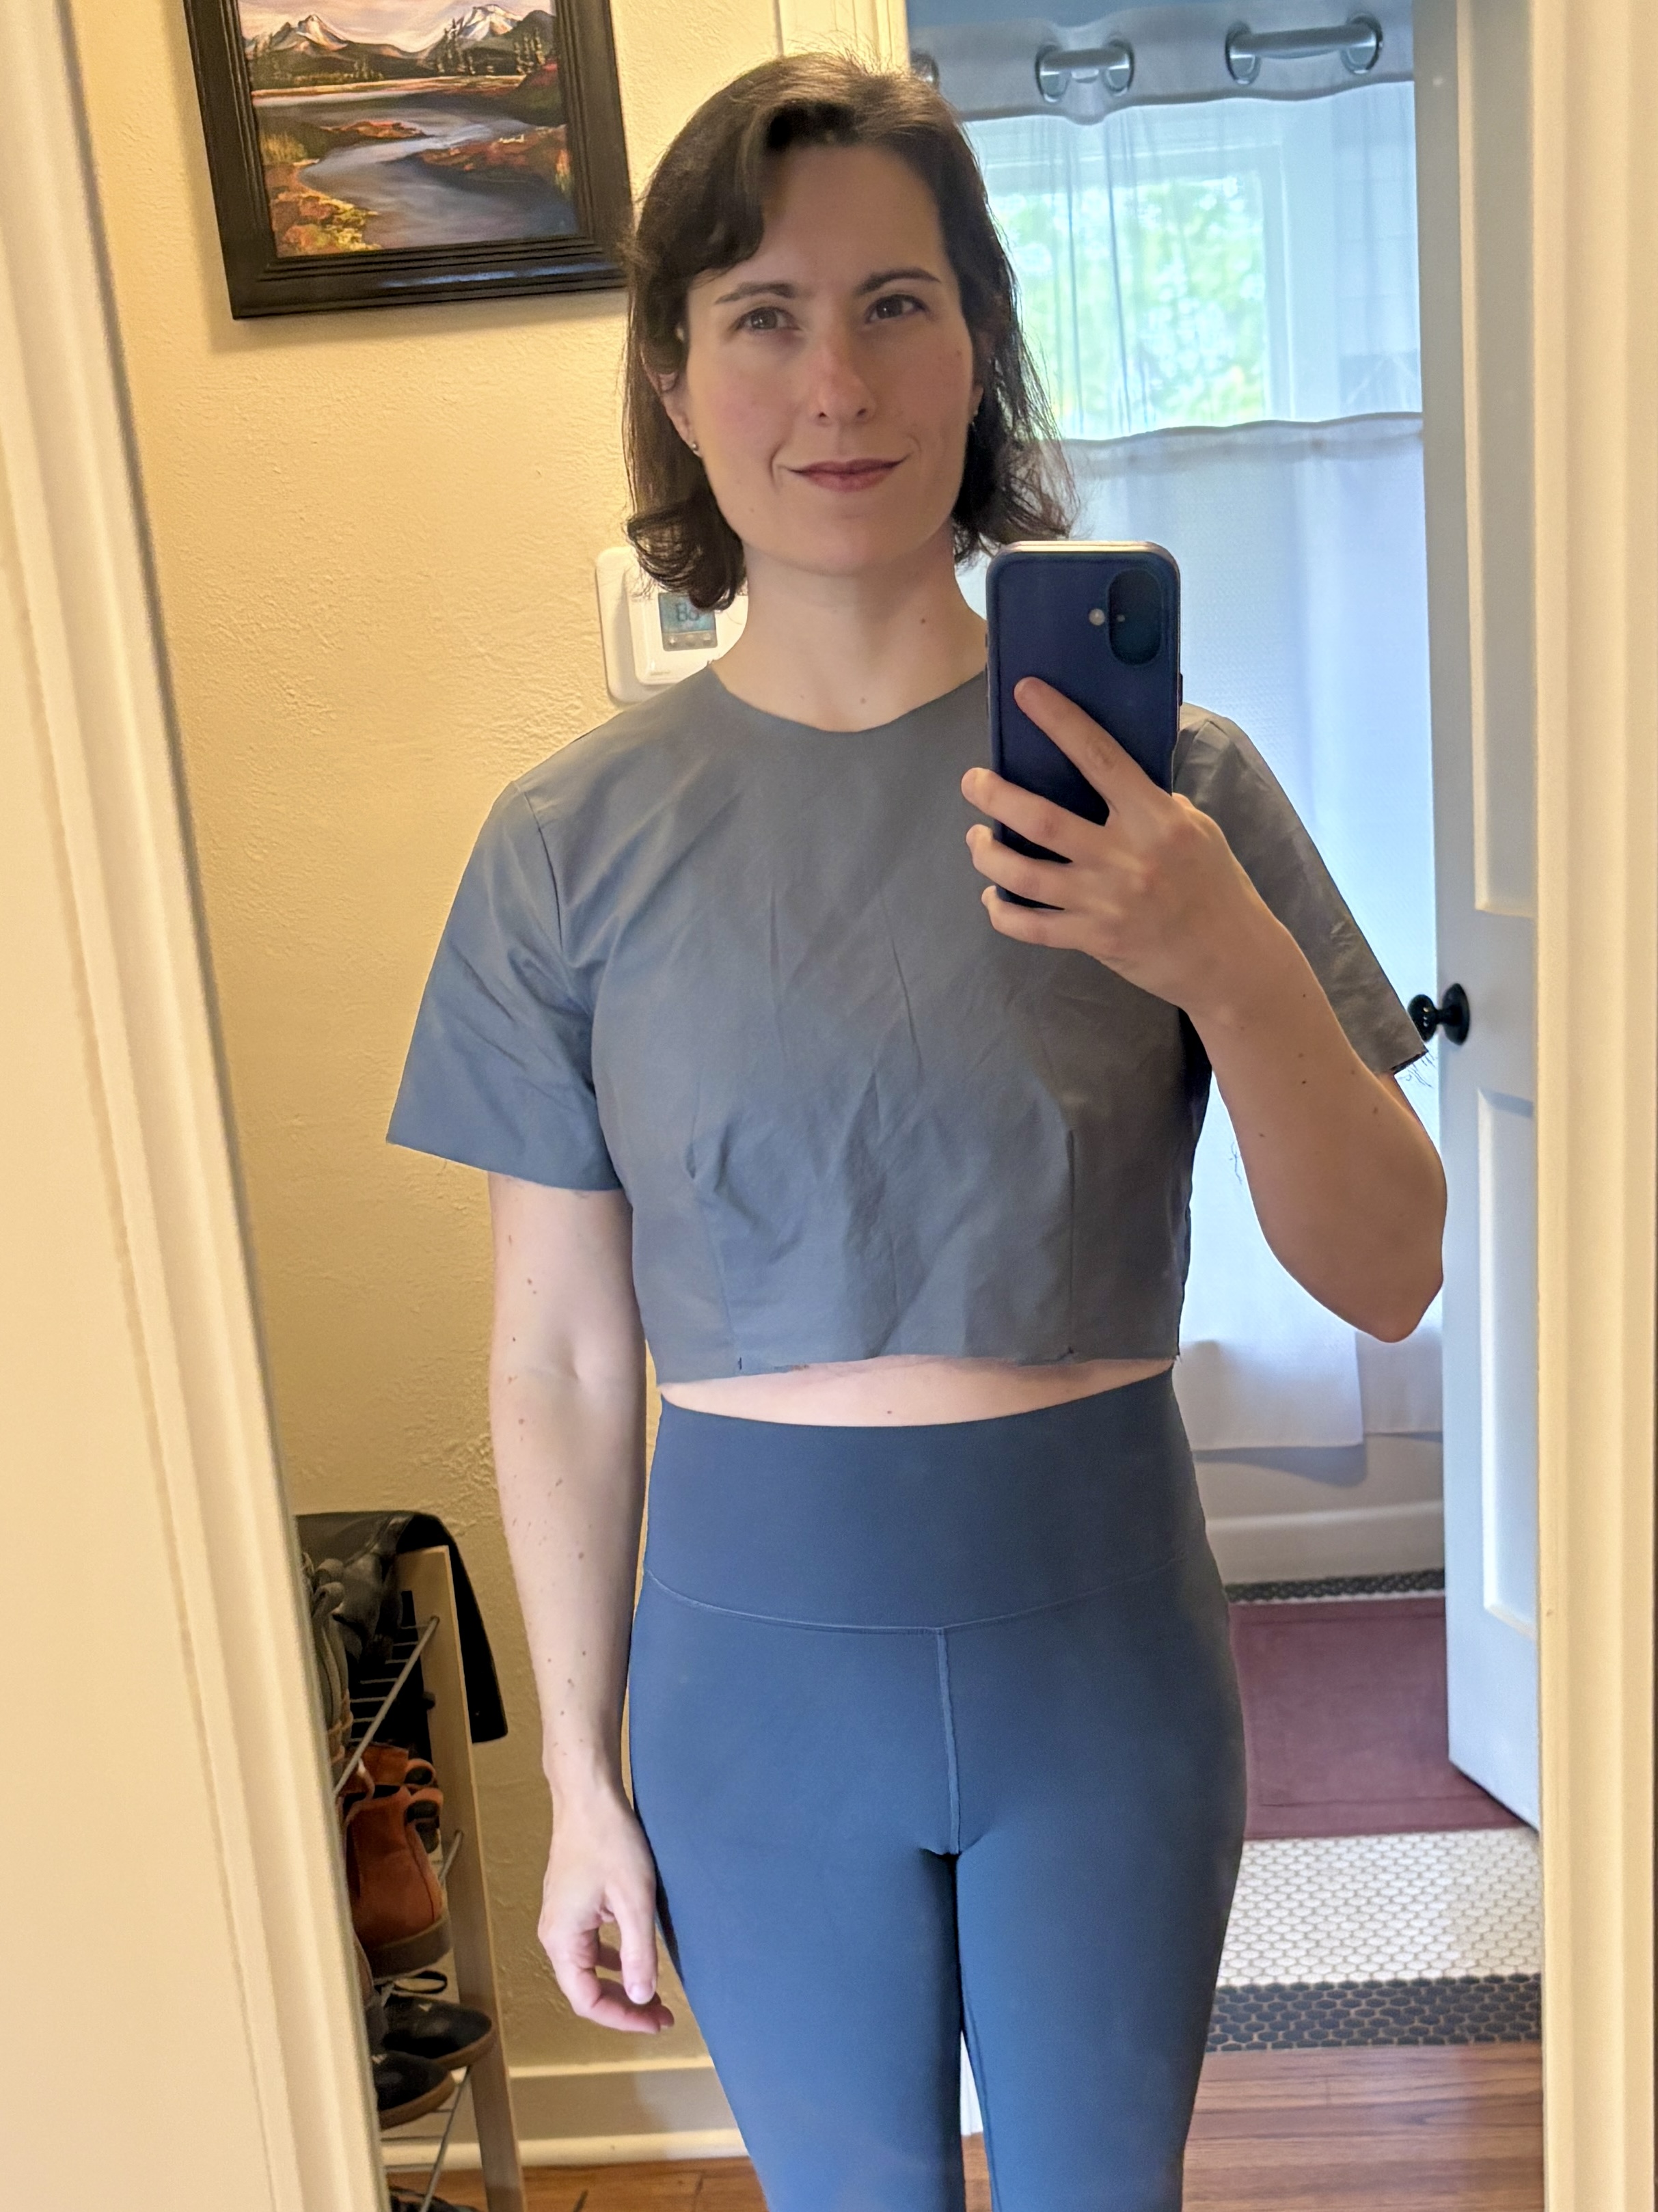
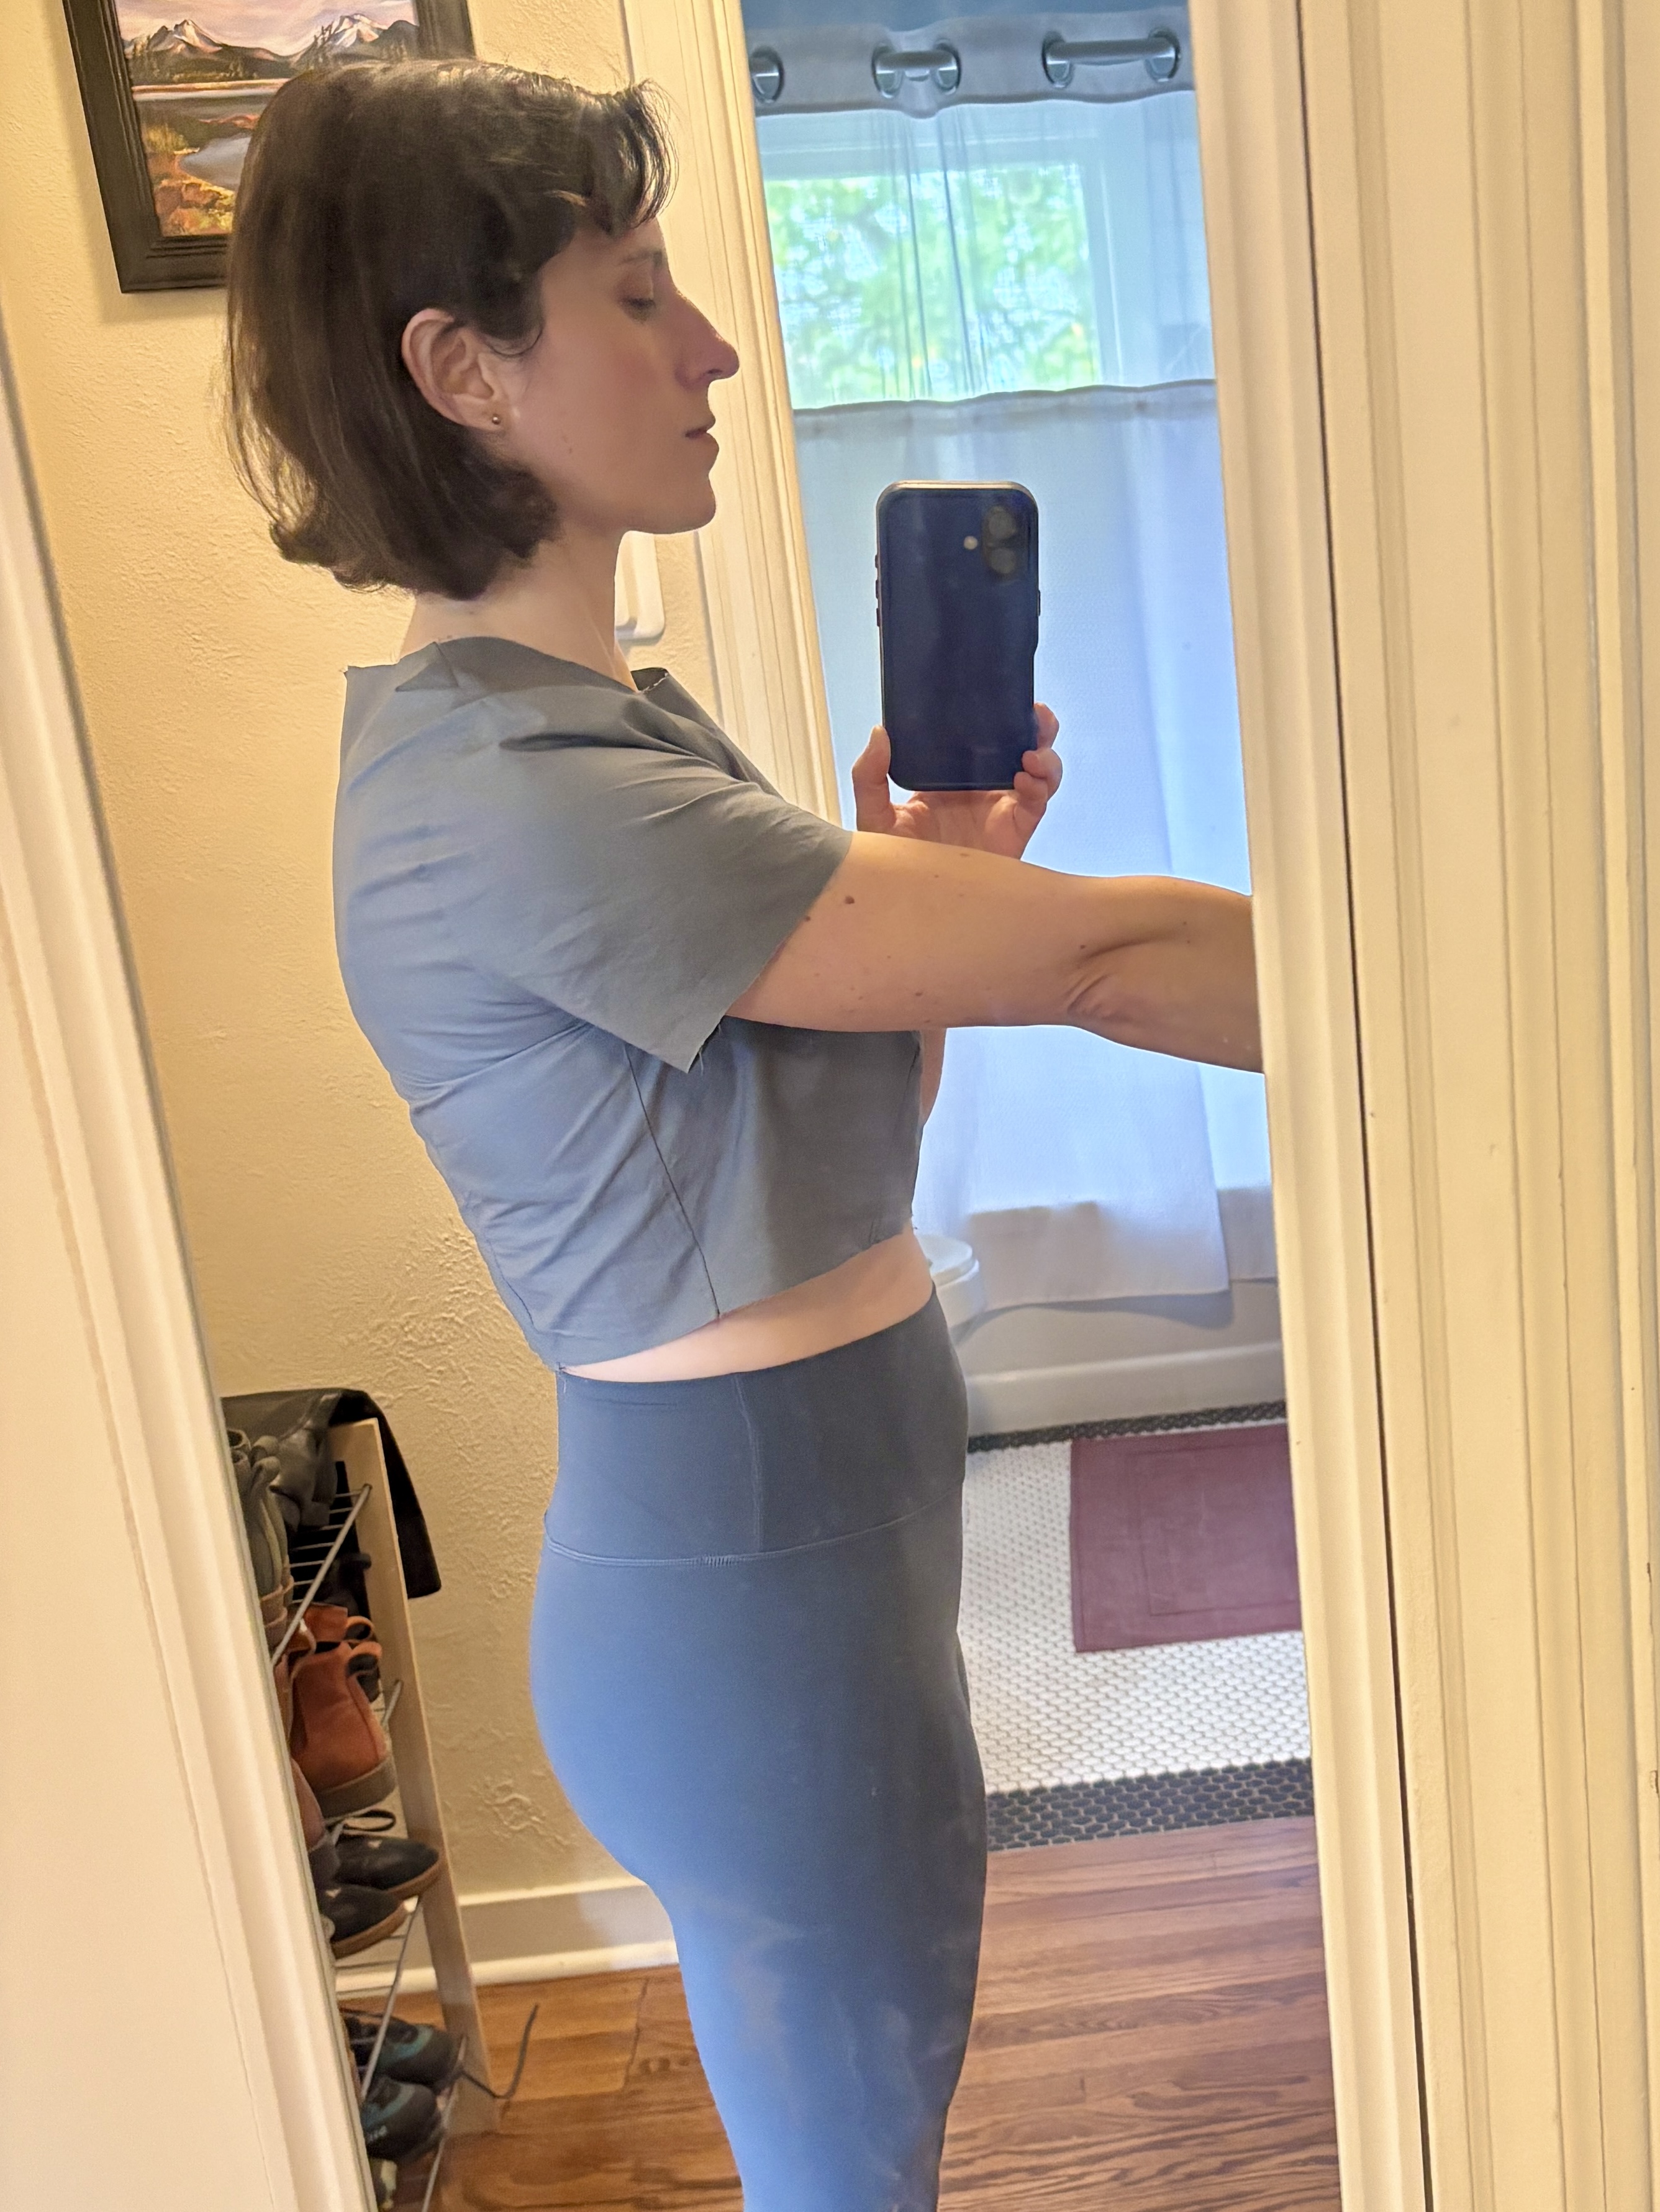
Unfortunately, as you can see in the images, the original bodice with the 13” bicep and smaller armholes is much “quieter,” with less wrinkling. This is the fit vs. mobility tradeoff in woven garments. The more sleeve mobility you add to a garment by widening the bicep and sleeve cap, lowering the cap height, or increasing the size of the armhole, the more excess material you’ll have in the armpit area to accommodate that movement. The trick is to find an ideal compromise—an amount of ease that lets you reach and move, but still looks tidy on your figure. I would say a slight bit of restriction is still ok—Armstrong never intended for us to do jumping jacks in our basic pattern block!—and in my experience it’s easier to add ease than to remove it.
Regardless, I could probably keep tweaking this thing with ten more muslins, but we all have to start somewhere. At least I can reach my keyboard with this version!
- M.J.